How To Make Origami Camellia? Beginners Guide
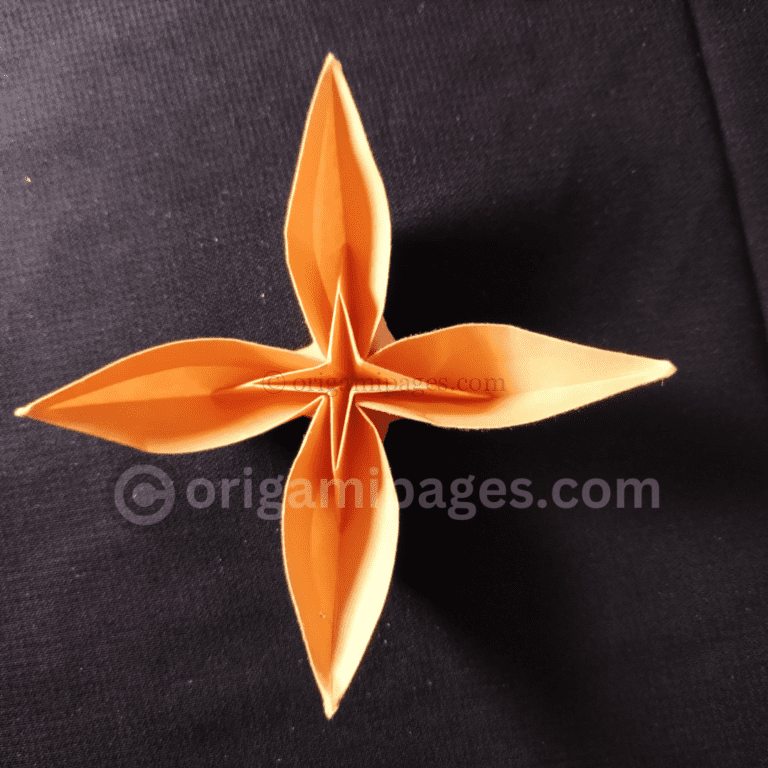
Origami enthusiasts, both novices and seasoned artists alike, embark on a delightful journey with the creation of the Origami Camellia. This exquisite flower, with its delicate petals and graceful form, captivates the imagination and invites exploration into the art of paper folding. Whether you’re just beginning your origami adventure or seeking a new challenge, crafting the Camellia promises a rewarding experience filled with both creativity and skill development.
Crafting the Origami Camellia is a step-by-step journey from simplicity to stunning intricacy. Beginners learn fundamental techniques, while experts refine skills and explore advanced variations. Each fold unveils the potential for discovery, making the process as fulfilling as the final masterpiece. Whether you’re an art enthusiast or seeking a creative outlet, crafting the Origami Camellia promises an enchanting experience for all skill levels, offering endless possibilities and the joy of artistic expression.

The Artistry of Origami Camellia
Crafting an origami camellia involves a series of folds that may seem intricate at first, but with careful guidance, even novices can achieve stunning results. The magic begins with a 15×15 cm paper, colored side down, setting the stage for the unfolding artistry.
Origami Camellia Step by Step
Origami Canvas Preparation
Start with a 15×15 cm paper, colored side down, providing the foundation for your floral masterpiece.


Initial Folds
Fold one corner up to the other and repeat on the opposite side, creating the foundational folds for the camellia.


Forming Bottom Petals
Fold the bottom left corner to the center line, followed by the bottom right corner, establishing the base for the unfolding beauty.

Squash Fold Technique
Execute a squash fold by gently prying open the corner, creasing along the vertical center line, and pressing down, adding dimension to your creation.

Triangle Transformation
Fold the paper into a triangle shape, replicating the squash fold for symmetry and depth in your camellia.


Turning and Folding
Turn the paper, fold a corner to the vertical center line, and commence the process of bringing your camellia to life.


Final Unveiling
With precision and patience, fold, tuck, and flap, witnessing the origami camellia take its graceful form, mirroring the beauty of nature.


Refining Details
Add the finishing touch by making small creases at the top of the bottom petals, completing the intricate details of your origami camellia.


Repeat Squash Fold
Revisit the squash fold technique, enhancing the three-dimensional effect of your camellia.


Tucking and Folding
Take the triangle created before and tuck it on the other side. Repeat the same with the remaining part, refining the final form.


Final Touch
Make a small crease at the top of the bottom petals, bringing your origami camellia to completion.

Origami Camellia: Easy and Joyful
This easy origami flower for kids and adults alike brings joy and accomplishment to the crafting table. The step-by-step instructions make the seemingly complex art of origami accessible to all. The satisfaction derived from creating such a stunning piece from a flat sheet is unparalleled, making the origami camellia an ideal starting point for beginners exploring the world of paper folding.
If you’re intrigued by the artistry of origami blooms, delve deeper into the world of paper folding with our guides on Origami Azalea and Origami Tulip. Our article on Origami azalea unfolds a detailed exploration along with comprehensive step-by-step instructions. Meanwhile, our article on Origami Tulip beckons you into a new realm of creativity and expression.Conclusion
As you complete the final folds of your origami camellia, a sense of achievement and tranquility will envelop you. The step-by-step process demystifies the art, proving that with patience and precision, anyone can create a beautiful origami masterpiece. The journey from a simple square to a blossoming camellia is not just about crafting a paper flower; it’s about discovering the joy and serenity that origami can bring into your life. Unfold your creativity, embrace the art of origami, and let the magic of the origami camellia bloom in your hands.


